Eight months ago, Apple released a fast, depth estimation model called "DepthPro". As of this writing, its at the top of the trending depth estimation list on Hugging Face.
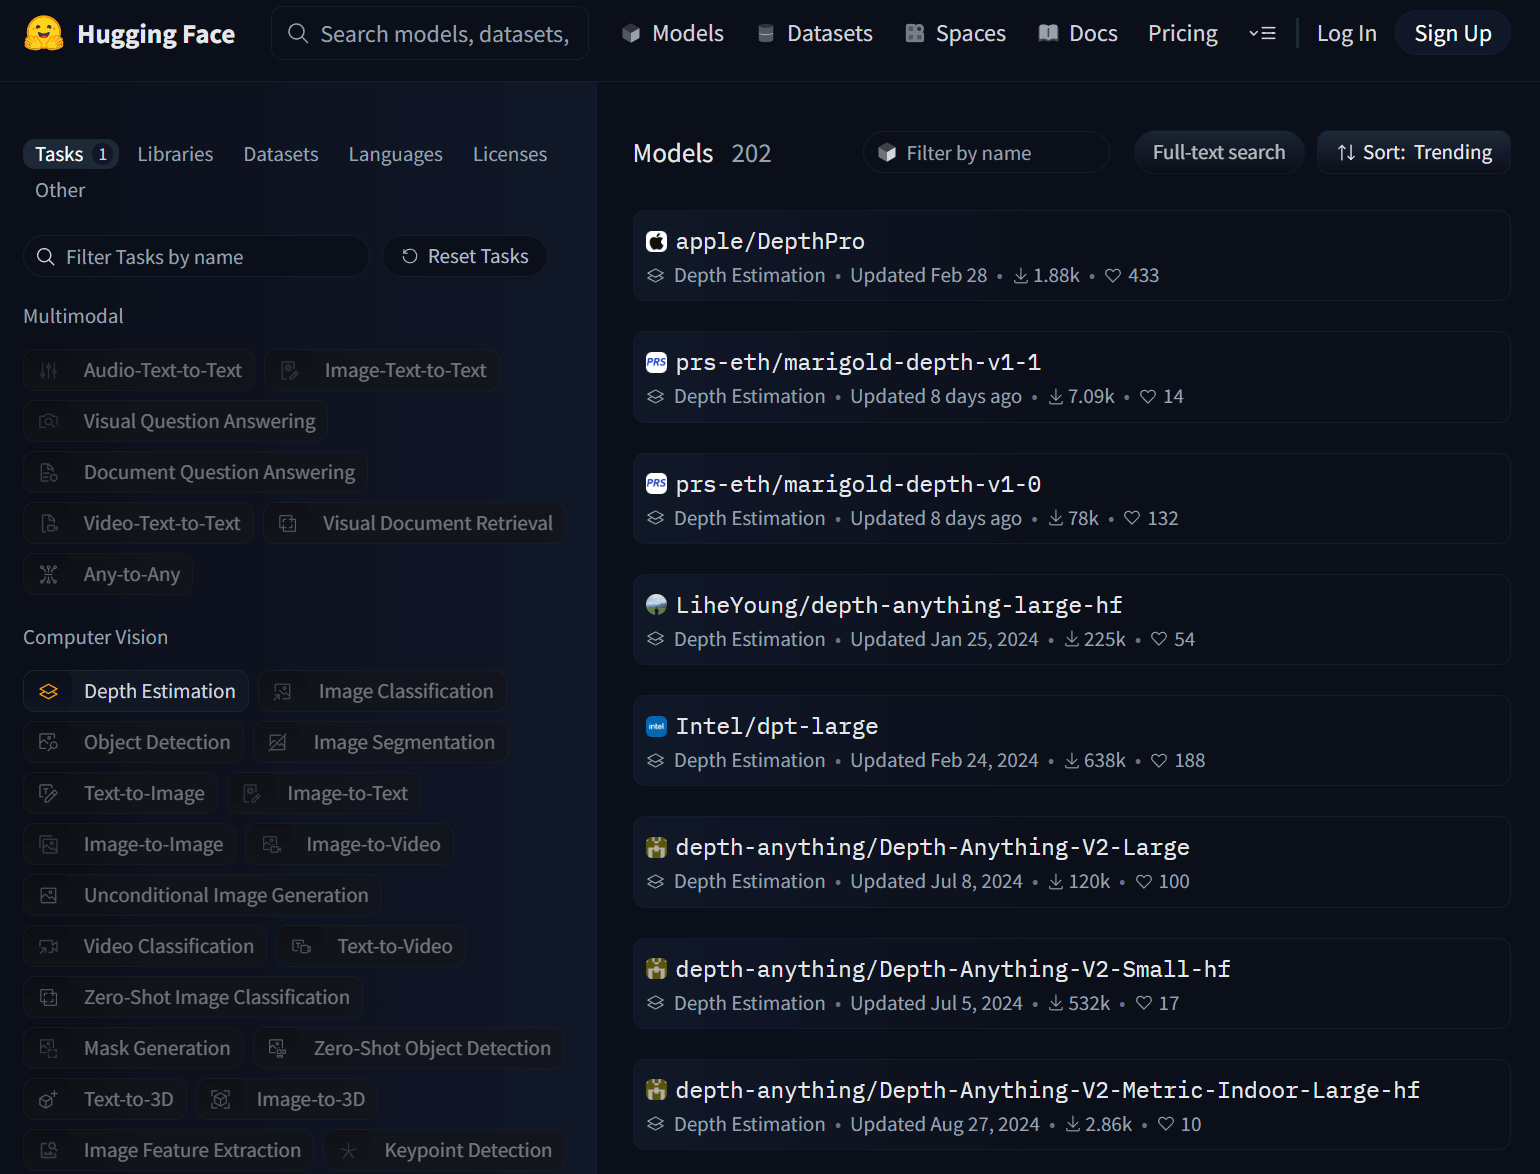
In this post, I'll run DepthPro against Maxar's 2025 satellite imagery of Bangkok, Thailand.
My Workstation
I'm using a 5.7 GHz AMD Ryzen 9 9950X CPU. It has 16 cores and 32 threads and 1.2 MB of L1, 16 MB of L2 and 64 MB of L3 cache. It has a liquid cooler attached and is housed in a spacious, full-sized Cooler Master HAF 700 computer case.
The system has 96 GB of DDR5 RAM clocked at 4,800 MT/s and a 5th-generation, Crucial T700 4 TB NVMe M.2 SSD which can read at speeds up to 12,400 MB/s. There is a heatsink on the SSD to help keep its temperature down. This is my system's C drive.
The system is powered by a 1,200-watt, fully modular Corsair Power Supply and is sat on an ASRock X870E Nova 90 Motherboard.
I'm running Ubuntu 24 LTS via Microsoft's Ubuntu for Windows on Windows 11 Pro. In case you're wondering why I don't run a Linux-based desktop as my primary work environment, I'm still using an Nvidia GTX 1080 GPU which has better driver support on Windows and ArcGIS Pro only supports Windows natively.
Installing Prerequisites
I'll use GDAL 3.9.3, Python 3.12.3 and a few other tools to help analyse the data in this post.
$ sudo add-apt-repository ppa:deadsnakes/ppa
$ sudo add-apt-repository ppa:ubuntugis/ubuntugis-unstable
$ sudo apt update
$ sudo apt install \
    gdal-bin \
    jq \
    python3-pip \
    python3.12-venv
I'll set up a Python Virtual Environment and install the a few dependencies needed to run Apple's model on geospatially-aware imagery.
$ python3 -m venv ~/.apple_depth
$ source ~/.apple_depth/bin/activate
$ python3 -m pip install \
    'GDAL==3.9.3' \
    numpy \
    opencv-python \
    'pillow==10.4.0' \
    torch \
    transformers \
    typer
The maps in this post were rendered using Esri's ArcGIS Pro 3.5. This is the latest version which was released last week.
Maxar's Bangkok Satellite Imagery
Maxar have an open data programme that I wrote a post on a few years ago. I later revisited this feed last month after the earthquake struck Myanmar and Thailand.
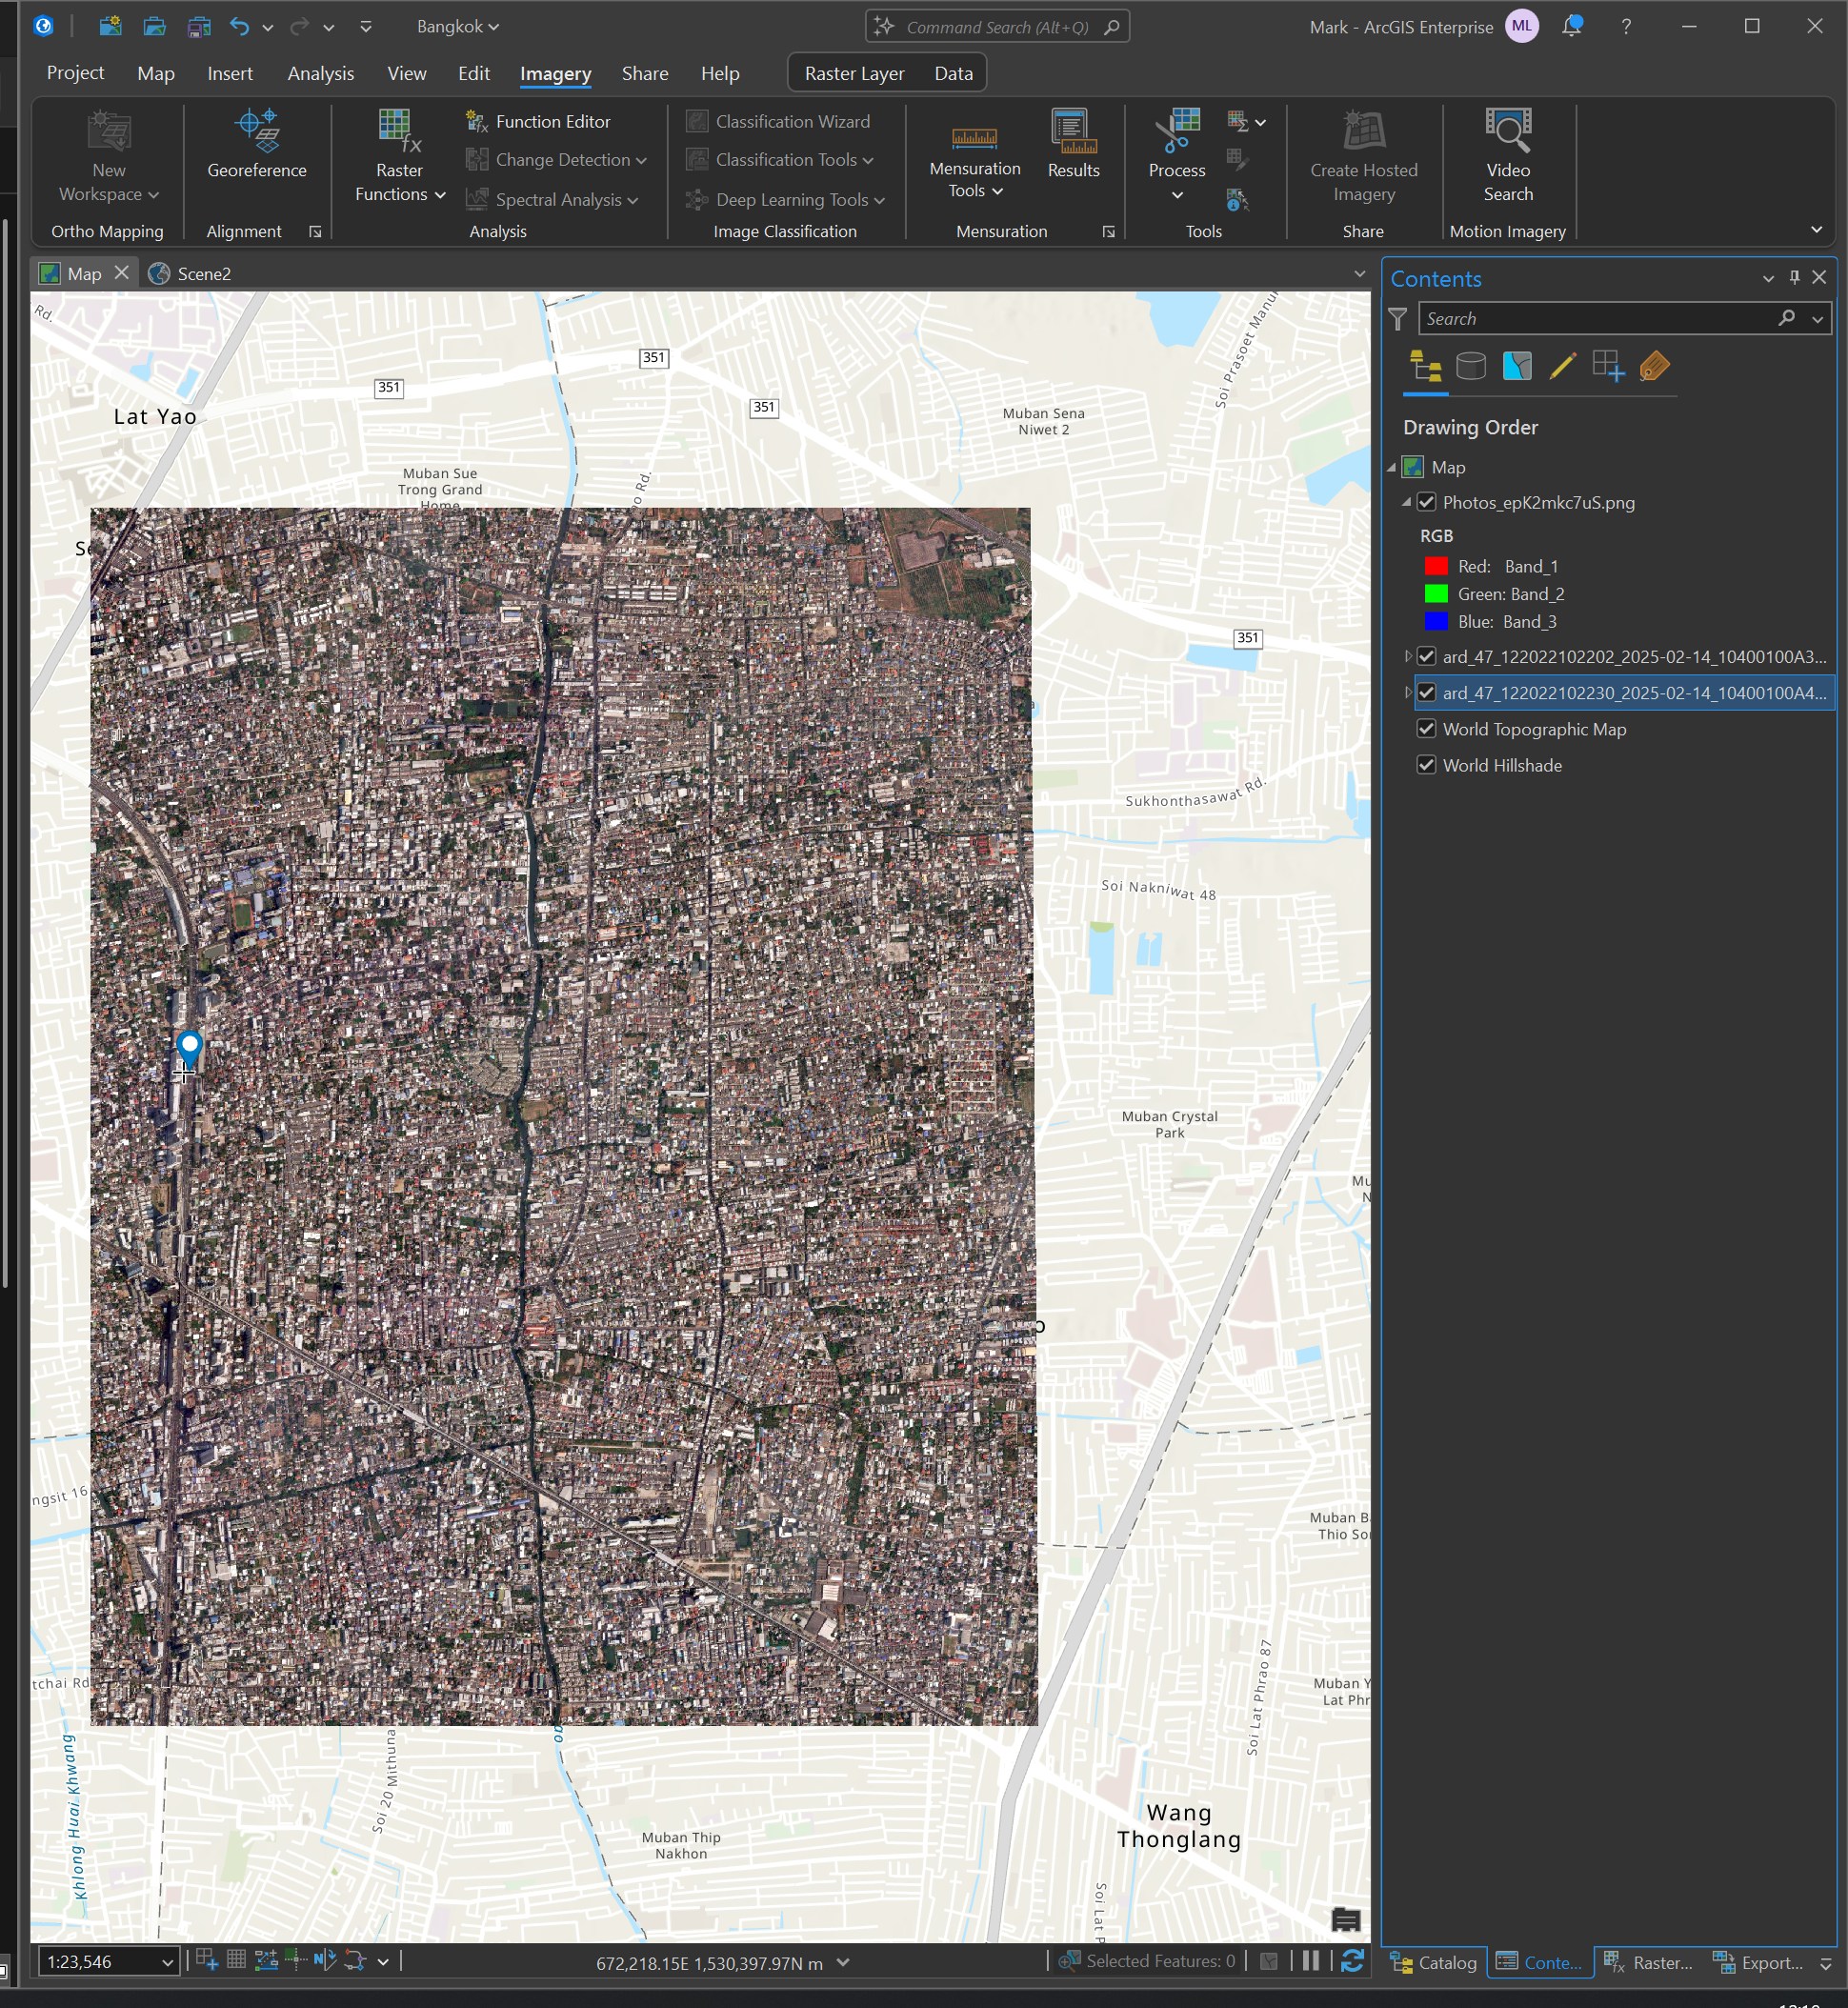
The image I'm using in this post covers part of the Chatuchak district in Bangkok and includes Ratchadaphisek Road which has several tall towers along it.
The image is a GeoTIFF pyramid containing a 17408x17408-pixel JPEG covering an area ~5.2 x 4.2 KM. The image was captured on February 14th by Maxar's WorldView 3 satellite at a resolution of 38cm.
$ wget https://maxar-opendata.s3.amazonaws.com/events/Earthquake-Myanmar-March-2025/ard/47/122022102203/2025-02-14/10400100A4C67F00-visual.tif
This is the image below in relation to its surrounding area in Bangkok.
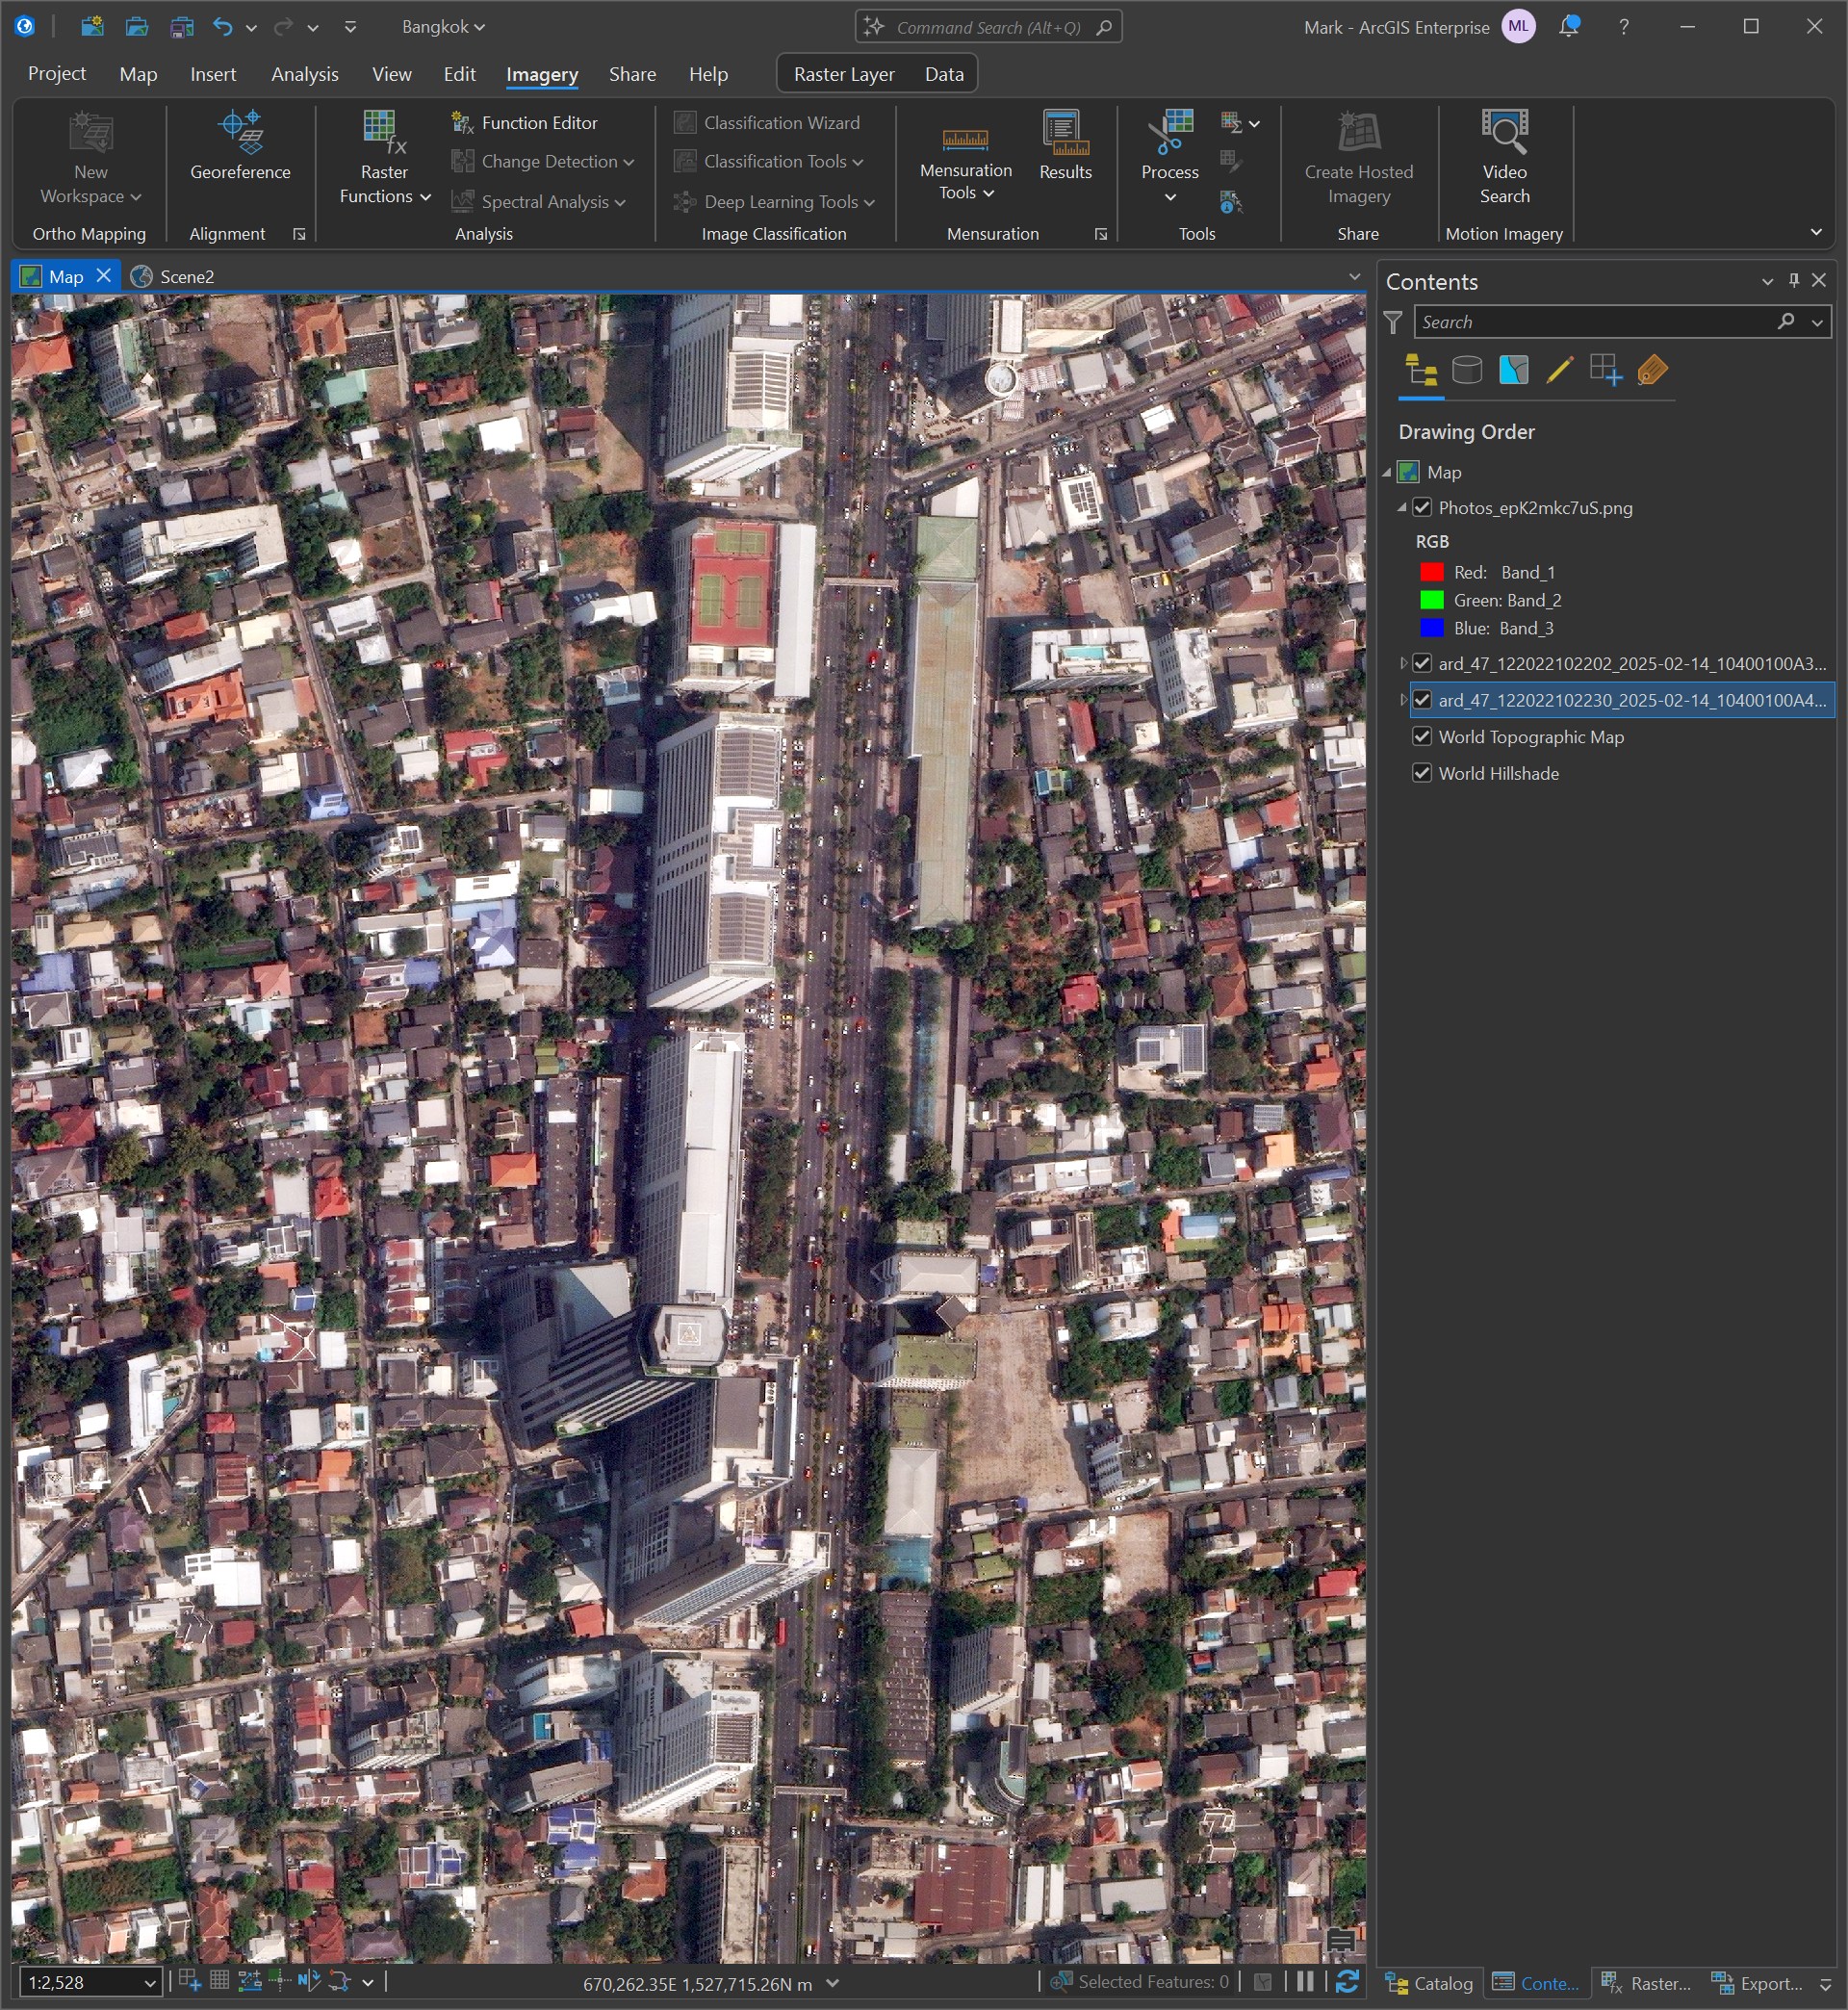
Below I've zoomed into Ratchadaphisek Road where you can see the tall towers.
This is the metadata for the above image.
{
  "geometry": {
    "coordinates": [
      [
        [
          100.574350016387555,
          13.833249903918164
        ],
        [
          100.525209298594646,
          13.833560533960037
        ],
        [
          100.525429970258031,
          13.86737334
        ],
        [
          100.574579936582708,
          13.86737334
        ],
        [
          100.574350016387555,
          13.833249903918164
        ]
      ]
    ],
    "type": "Polygon"
  },
  "properties": {
    "ard_metadata_version": "0.0.1",
    "catalog_id": "10400100A4C67F00",
    "data-mask": "https://maxar-opendata.s3.amazonaws.com/events/Earthquake-Myanmar-March-2025/ard/47/122022102203/2025-02-14/10400100A4C67F00-data-mask.gpkg",
    "datetime": "2025-02-14T04:02:15Z",
    "grid:code": "MXRA-Z47-122022102203",
    "gsd": 0.38,
    "ms_analytic": "https://maxar-opendata.s3.amazonaws.com/events/Earthquake-Myanmar-March-2025/ard/47/122022102203/2025-02-14/10400100A4C67F00-ms.tif",
    "pan_analytic": "https://maxar-opendata.s3.amazonaws.com/events/Earthquake-Myanmar-March-2025/ard/47/122022102203/2025-02-14/10400100A4C67F00-pan.tif",
    "platform": "WV03",
    "proj:bbox": "664843.75,1529843.75,670156.25,1533619.8386004784",
    "proj:code": "EPSG:32647",
    "proj:geometry": {
      "coordinates": [
        [
          [
            670156.25,
            1529843.75
          ],
          [
            664843.75,
            1529843.75
          ],
          [
            664843.75,
            1533585.6070091636
          ],
          [
            670156.25,
            1533619.8386004784
          ],
          [
            670156.25,
            1529843.75
          ]
        ]
      ],
      "type": "Polygon"
    },
    "quadkey": "122022102203",
    "tile:clouds_area": 0.0,
    "tile:clouds_percent": 0,
    "tile:data_area": 19.9,
    "utm_zone": 47,
    "view:azimuth": 243.9,
    "view:incidence_angle": 59.9,
    "view:off_nadir": 27.2,
    "view:sun_azimuth": 139.3,
    "view:sun_elevation": 55.3,
    "visual": "https://maxar-opendata.s3.amazonaws.com/events/Earthquake-Myanmar-March-2025/ard/47/122022102203/2025-02-14/10400100A4C67F00-visual.tif"
  },
  "type": "Feature"
}
Tiling Maxar's Imagery
The examples of the model I've come across worked on images that were 768x768-pixels. I'll break up Maxar's image into tiles of this size.
The following produced 552 GeoTIFF images.
$ gdalwarp \
    -t_srs "EPSG:4326" \
    ard_47_122022102230_2025-02-14_10400100A4C67F00-visual.tif  \
    warped.tif

$ gdal_retile.py \
    -s_srs "EPSG:4326" \
    -ps 768 768 \
    -targetDir ./ \
    warped.tif
Below are a few of the tiles generated.

The Inference Script
The following script will accept the filename of a tile, run it through Apple's model and save the result to a new GeoTIFF with a 'depth' prefix in its filename.
The location and projection details from the source tiles will be copied into their respective resulting depth image files as well.
$ vi apple_depth.py
from   os.path      import splitext

import cv2
import numpy as np
from   osgeo        import gdal
from   PIL          import Image
import torch
from   transformers import DepthProImageProcessorFast, \
                           DepthProForDepthEstimation
import typer


app = typer.Typer(rich_markup_mode='rich')


def get_depth(image):
    device          = torch.device('cuda' if torch.cuda.is_available() else 'cpu')
    image_processor = DepthProImageProcessorFast.from_pretrained('apple/DepthPro-hf')
    model           = DepthProForDepthEstimation.from_pretrained('apple/DepthPro-hf')\
                                                .to(device)

    image  = Image.fromarray(image)
    inputs = image_processor(images=image,
                             return_tensors='pt')\
                .to(device)

    with torch.no_grad():
        outputs = model(**inputs)

    post_processed_output = \
        image_processor.post_process_depth_estimation(
            outputs,
            target_sizes=[(image.height,
                           image.width)],)

    depth = post_processed_output[0]['predicted_depth'].cpu().numpy()
    return (depth - np.min(depth)) / (np.max(depth) - np.min(depth))


@app.command()
def main(filename:str):
    gdal.UseExceptions()

    image = cv2.cvtColor(cv2.imread(filename,
                                    cv2.IMREAD_COLOR),
                         cv2.COLOR_RGB2BGR)
    depth = get_depth(image)

    rest, ext = splitext(filename)
    out_name  = 'depth.%s%s' % (rest, ext)

    cv2.imwrite(out_name, depth)

    with gdal.Open(filename) as source:
        with gdal.Open(out_name, gdal.GA_Update) as depth:
            depth.SetGeoTransform(source.GetGeoTransform())
            depth.SetProjection(source.GetProjection())
            depth.SetGCPs(source.GetGCPs(),
                          source.GetGCPProjection())


if __name__ == "__main__":
    app()
Running Inference
I'll run the 552 tiles through the above Python script.
$ for FILENAME in warped_*_*.tif; do
    echo $FILENAME
    python apple_depth.py $FILENAME
  done
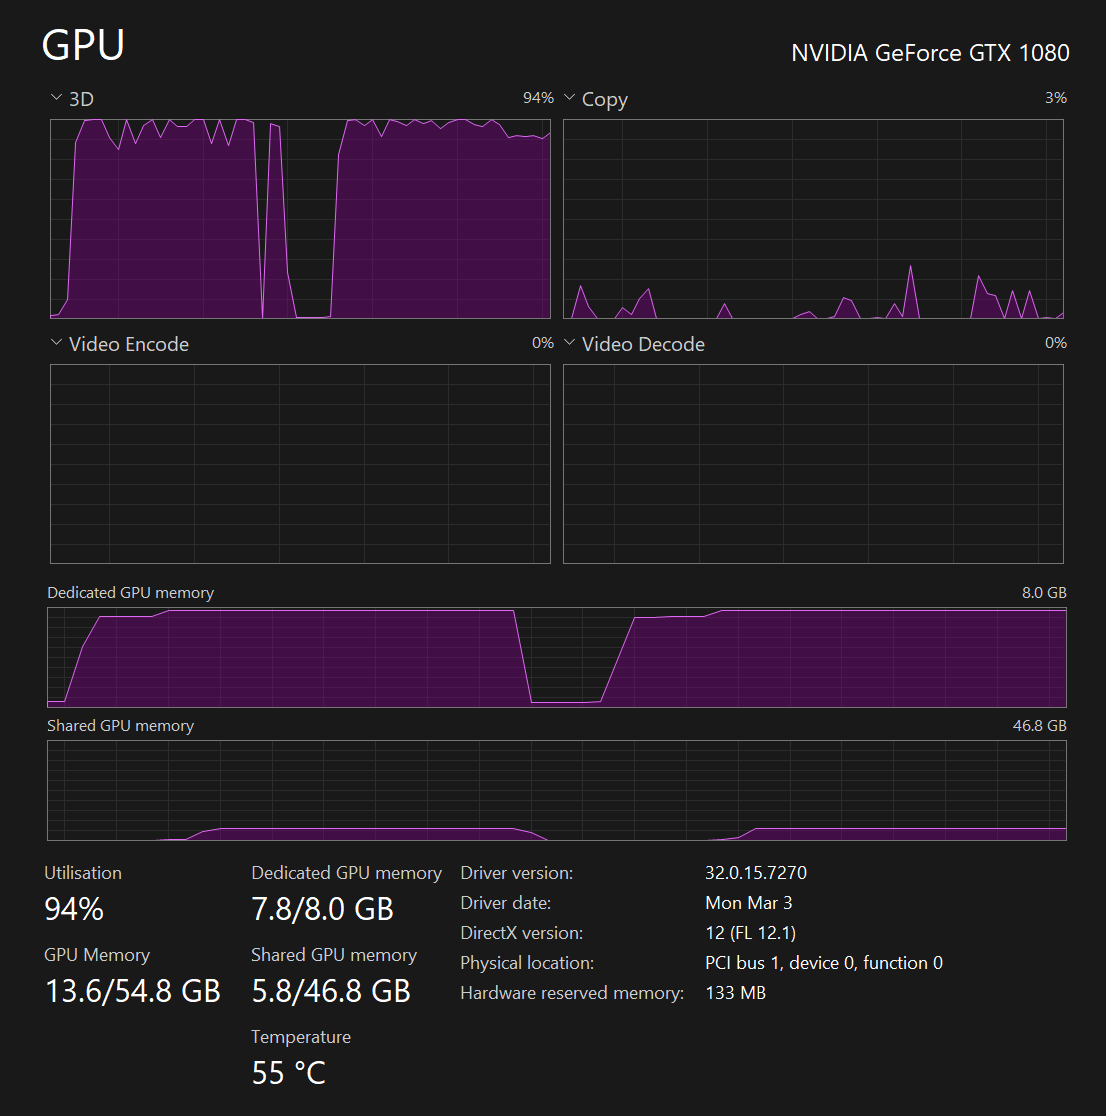
The inference took place on my GPU. Below is a snapshot of its telemetry during the above run.
I'll patch the resulting depth maps together so I can load them as a single image in ArcGIS Pro.
$ gdalbuildvrt \
    apple_depth.vrt \
    depth.warped_*.tif

$ gdal_translate \
    -of GTIFF \
    apple_depth.vrt \
    apple_depth.tif
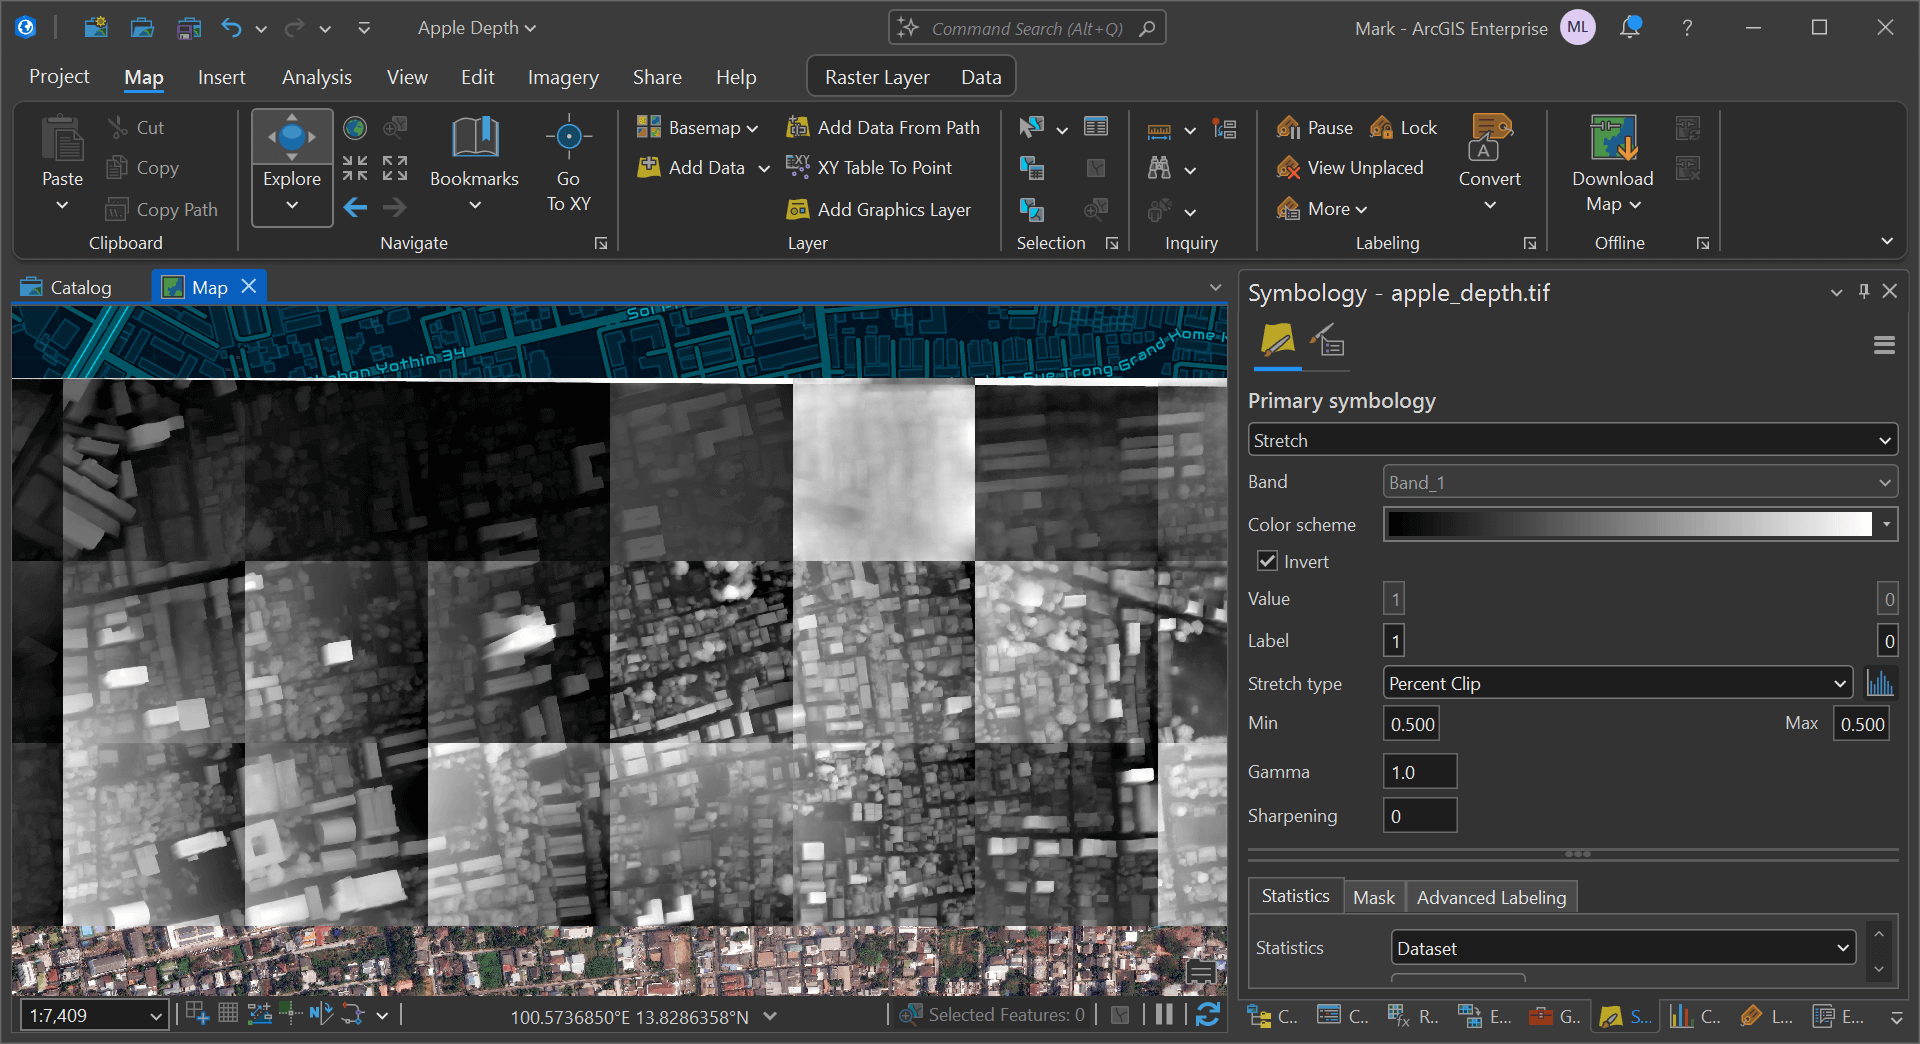
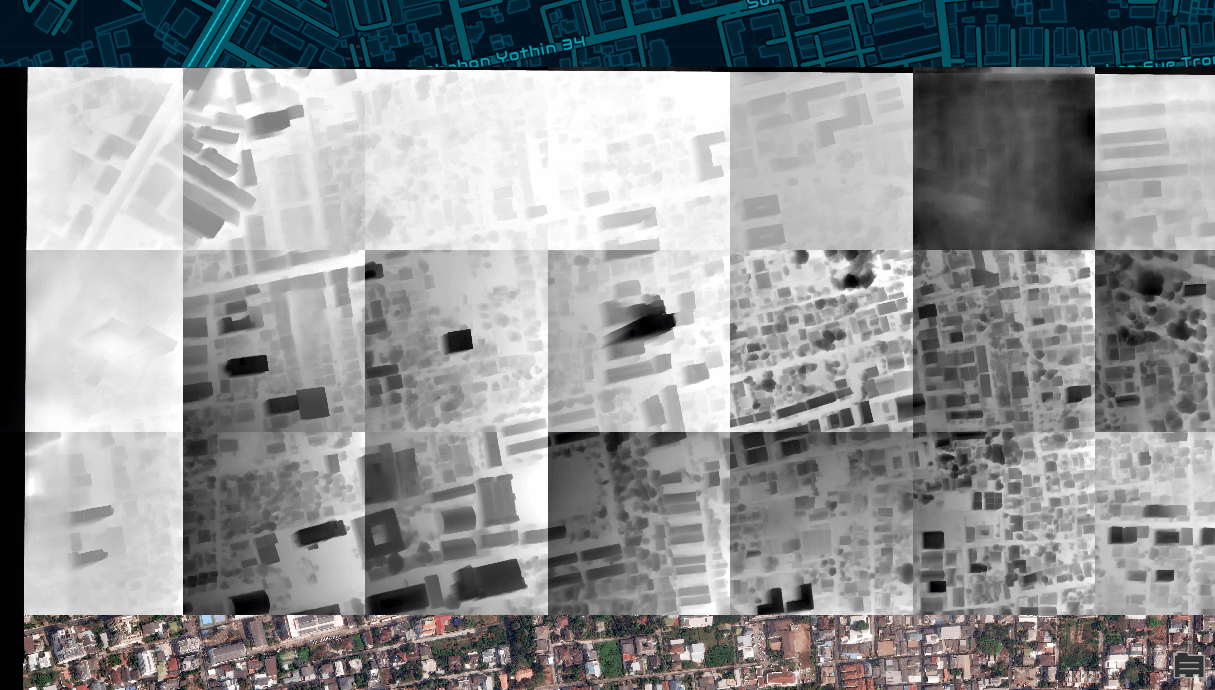
The Resulting Heatmap
I took this screenshot after three of the 24 rows of tiles had been processed.
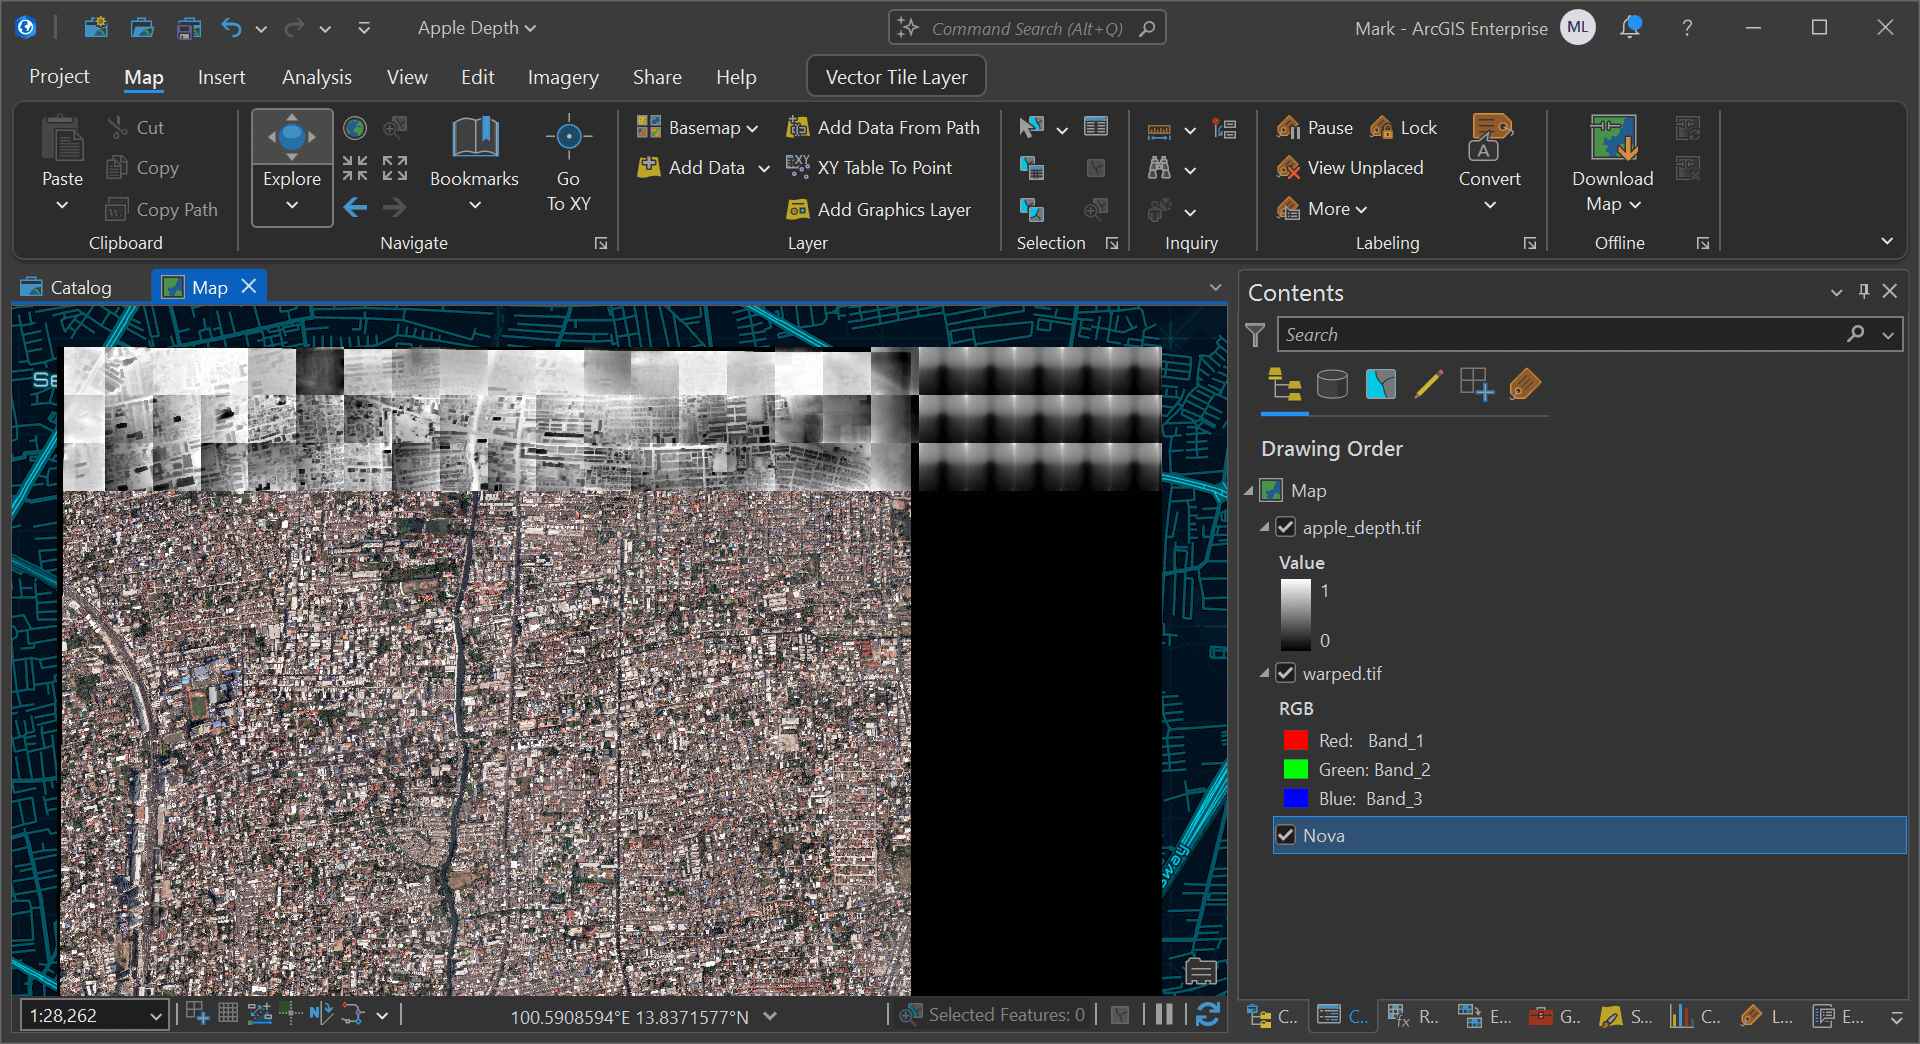
The tiles were inferred in isolation of one another so their scales won't align up. Nonetheless, having them positioned over their source imagery and real-world location helps with reviewing the model's results.
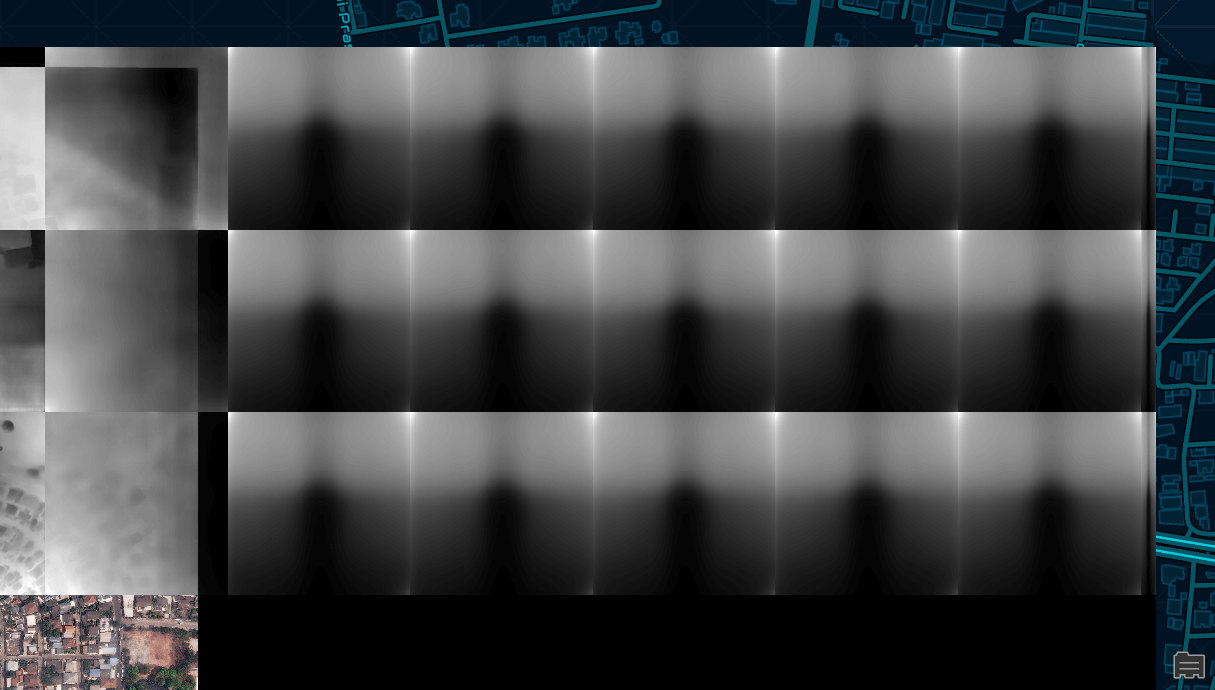
Part of the source image was blank. The model still treats this area as having data and has produced these gradient patterns.
I'll select Apple's Depth layer and search for "swipe" in the search box at the top of the UI. I'll select the top result "Swipe (Enable layer swipe)".
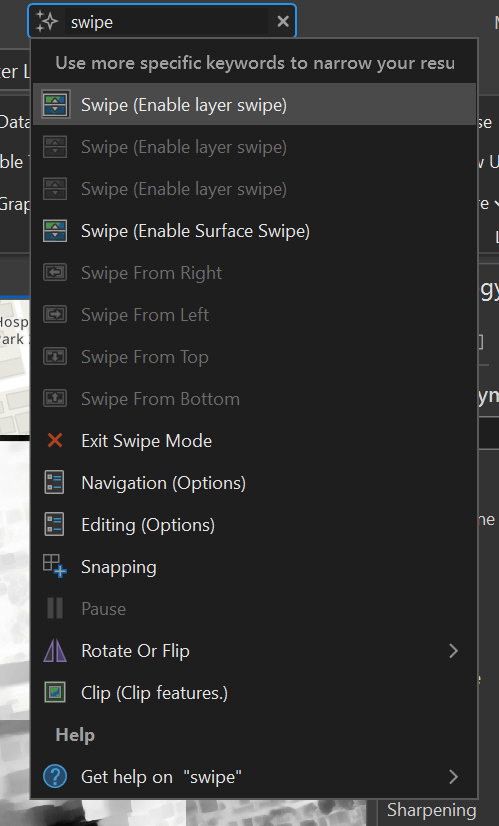
I can now use the swipe tool to compare the depth map to Maxar's source imagery.
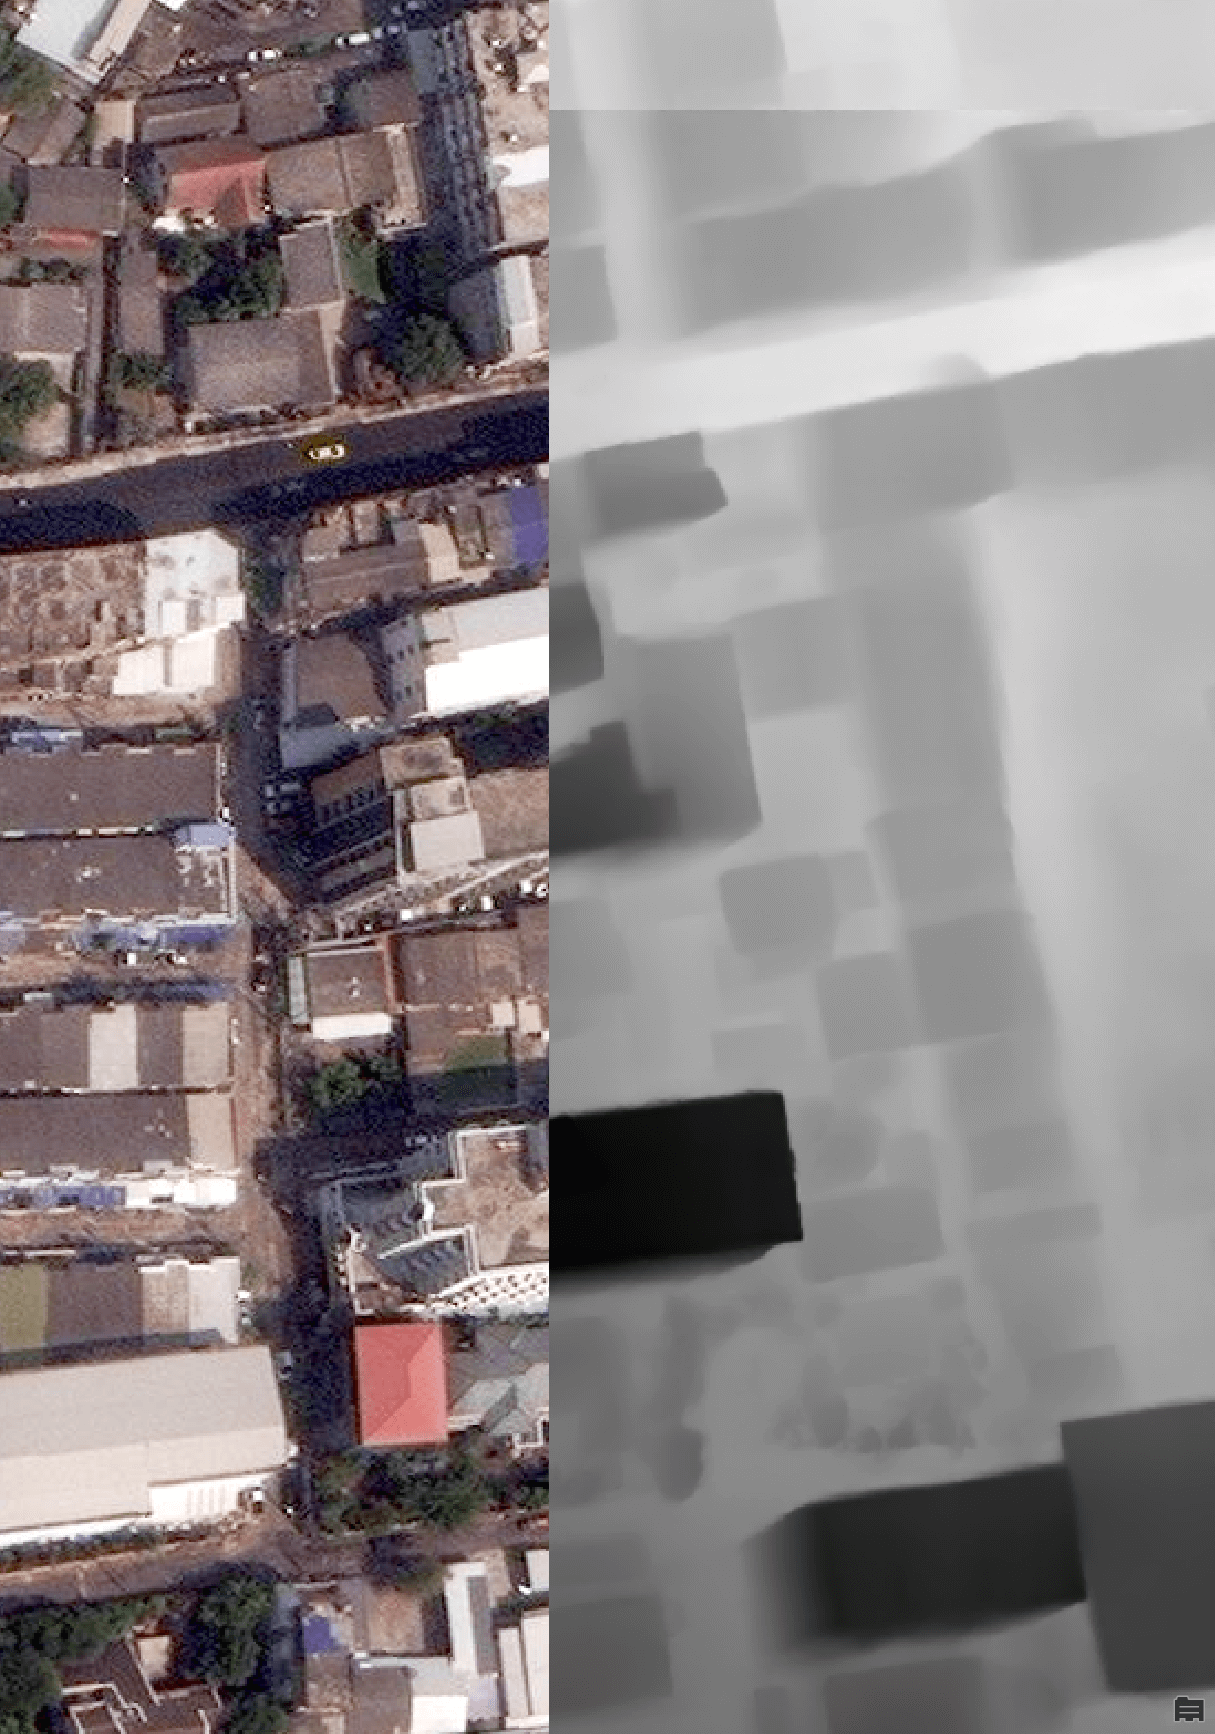
Inverting the depth map might make it easier to interpret and compare to underlying imagery.